Rolling a joint is an important skill for anyone who enjoys cannabis. For those who are totally new to rolling or just want to level up their roll, this is a great way to improve their experience.
A well-rolled joint will burn evenly, hit consistently, and fully showcase your cannabis. In this guide, we will cover each step from the selection of materials to smoking it like a pro.
Why Rolling Matters
Though pre-rolls and cones can be exciting options, rolling a joint by hand can be beneficial for the following reasons:
- Customizability: You can choose any strain, quantity, and type of rolling paper that you wish.
- Affordability: Rolling a joint by hand is more cost-effective than buying a pre-roll.
- Satisfaction: There is an element of satisfaction in rolling your joints.
In addition, once you develop the skill of rolling, you’ll feel confident that you won’t be caught without something to smoke when you are out of pre-rolls or cones.
What You’ll Need for a Rolling Joint
Before you begin, you will need the following essentials:
- Rolling papers: rice papers, hemp papers, wood pulp papers.
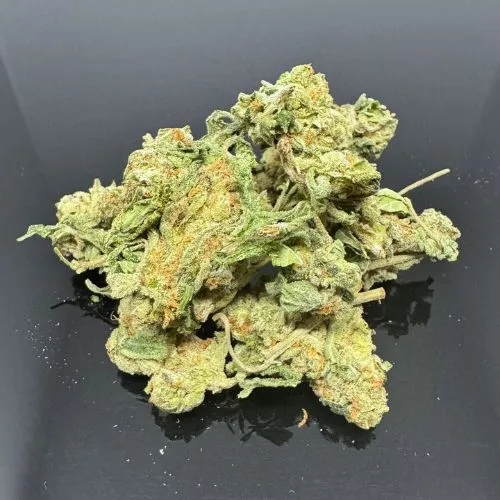
- Cannabis flower: Choose your favourite strain and grind the flower evenly.
- Grinder: needed to break the buds down into smokeable pieces.
- Filter: keeps sturdy on the end of the roll and stops bits of herb from falling into your mouth.
- Rolling tray or clean surface: keeps your mess contained and helps you gather up any spilt material.
- Packing tool: To finish off your joint, you will use either a pen, a toothpick, or the actual poker you purchased.
Step-by-Step Guide to Rolling the Perfect Joint
- Grind Your Marijuana
Use a grinder to break your marijuana down into a fluffy, even texture, careful not to make it too fine – it should resemble loose oregano. An even grind will help the marijuana burn evenly.
- Create a Filter Tip (Crutch)
Take a small square of sturdy paper (like a business card), and fold it a couple of times like an accordion. Then roll it into a tube. The filter will add structure and allow for better airflow.
- Place the Paper
Hold the rolling paper with the glue side facing up and away from you. Place the filter at one end of the paper.
- Place Cannabis on the Paper
Sprinkle ground cannabis on the paper as evenly as possible. You can keep it even the length of the paper, or add a little more in the middle if you want a cone shape. Start with about 0.5 to 0.7 grams for beginners.
- Shape the Joint
Gently pinch the joint with your fingers and roll it back and forth to shape the cannabis into a cylinder. This is where you create the body of the joint.
- Tuck and Roll
Tuck in the side of the paper without glue over the cannabis and roll upward. When it’s snug, lick the adhesive strip and close the joint by pressing down from one end to the other.
This step can feel a little awkward at first, but the more you practice the tuck and roll, the more comfortable you’ll feel.
- Packing the end
Pack down the open end of the joint with a pen tip, toothpick, or small poker. This helps to pack the cannabis down so that it burns evenly and keeps its shape. Once you have the open end packed, twist the end to close it.
Common Mistakes to Avoid
Even experts can make mistakes. Here are a few errors by newbies to avoid:
- Rolling too loose: This will create uneven burn and airflow problems.
- Rolling too tight: This will all but cut off airflow and make it nearly impossible to draw smoke.
- Rolling with wet weed: This will make rolling more difficult and may keep your joint from burning.
If you are running low on quality flowers, then reputable weed delivery Cambridge services can have high-quality cannabis at your door quickly and easily so that you can practice your joints without too much delay.
Tips for a Better Roll
- Use a rolling tray: It can help catch spillage and keep your space clean.
- Practice with tobacco: You may also wish to practice without wasting weed.
- Purchase pre-rolled cones: If you’re still learning, this is a low-effort option for rolling that will still allow you to get practice with the packing and preparation parts.
- Watch tutorials: If you are a visual learner, you might learn better by watching some YouTube videos that show people doing what you are trying to do in real time.
How to Light and Smoke Your Joint
Once you have your joint rolled, the way you light the joint is equally important as the way you rolled it. Here’s how:
- Use a lighter.
- Place the joint in your mouth, but don’t puff yet.
- Slowly rotate the joint while putting the flame close to the twisted end.
- Allow it to toast around the edge before inhaling.
This will prevent canoeing where one side burns faster than the other and gives you a smooth, consistent smoke.
Conclusion
Rolling the perfect joint is a learned skill that gets easier with time and practice. Begin with quality materials, follow each step with care, and do not worry if the first joints you roll have a little learning curve. Soon, you will be rolling joints that look and smoke like they are from a dispensary.
If you find yourself in need of some fresh supplies, reliable weed delivery services make getting everything you need quick and discreet. So grab your grinder, papers, and flower, and start rolling a perfect joint today.


